How to Check if Your Email IP Is Blacklisted?
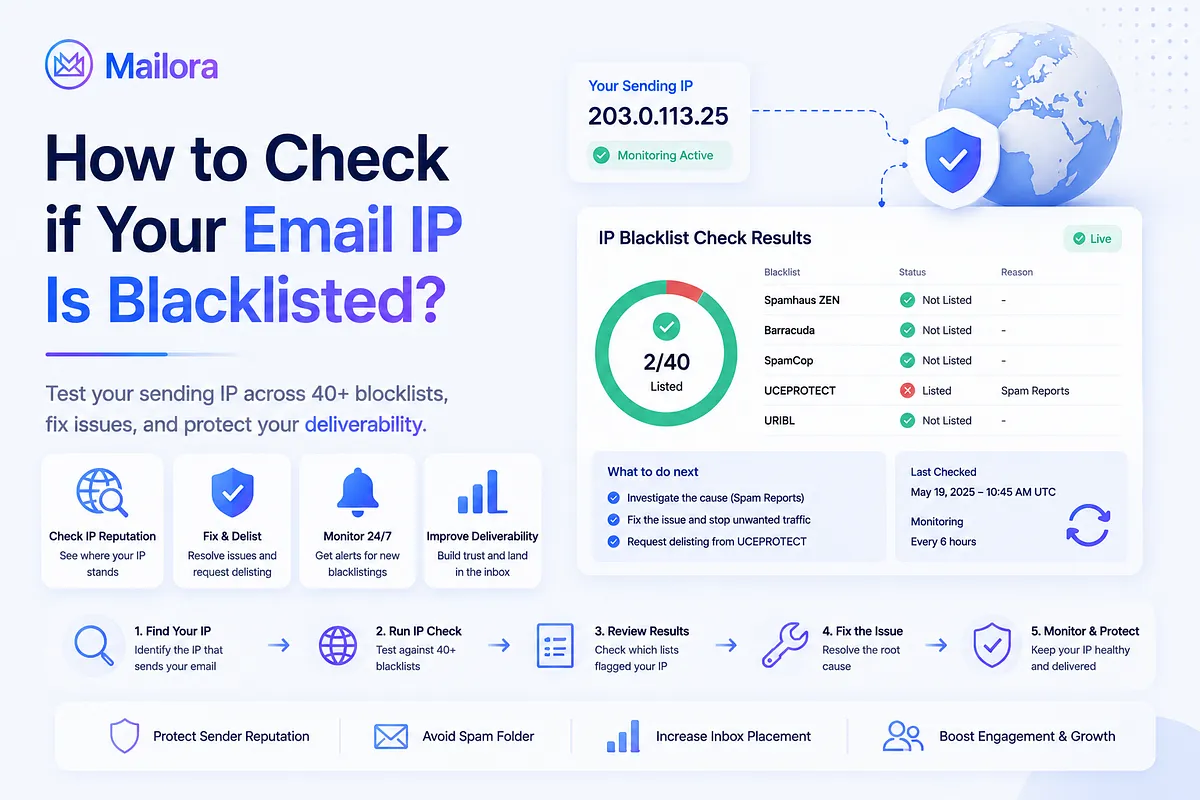
Key Takeaways
|
An IP blacklist test checks whether an IP address associated with your email sending appears on one or more blocklists that track addresses linked to spam, abuse, or other unwanted activity. These lists can influence how mailbox providers evaluate incoming mail, but a blacklist result alone does not determine whether your emails will reach the inbox.
If your sending IP is listed, it can be a useful signal that something in your sending setup needs attention. The listing may be related to sending behavior, poor list quality, compromised infrastructure, or another reputation issue. At the same time, a clean result does not guarantee good deliverability. Mailbox providers also consider authentication, sender reputation, engagement, content, and other signals when filtering email.
That makes an IP blacklist test a useful diagnostic step, rather than a complete deliverability assessment. You need to know which IP to check, how to interpret the result, and what to investigate if a listing appears.
In this guide, we'll explain how to check if your IP is blacklisted, how to read blacklist results, what to do if your IP is listed, and how to monitor and prevent future listings.
How to Find the IP You Actually Need to Check
The right IP depends on how your mail is sent, whether from your own mail server, a dedicated IP, or a third-party email service. Checking the wrong IP can give you a valid PTR result that says nothing about your actual sending infrastructure.
1. Check Your Email Headers
If you're troubleshooting a specific email or delivery issue, start with the message headers. They show the servers involved in the delivery path and can help you identify the sending infrastructure.
Look for the header information that identifies the connecting or originating sending IP. Header names and delivery paths vary by mailbox provider, so don't assume the first IP you see is the one you need to check.
If a message passes through multiple servers, you may see several IP addresses. Focus on the IP associated with the server that actually connected to the recipient's mail server.
2. Check Your ESP or SMTP Provider
If you send email through a third-party provider, your messages may come from the provider's infrastructure rather than your own server.
For example, your marketing platform may use one set of shared or dedicated IPs, while your transactional email provider uses another. Ask your provider which IPs are used to send your messages and whether those IPs are:
- Dedicated: Assigned specifically to your account or organization.
- Shared: Used by multiple customers.
Reputation of a shared IP can be influenced by activity from other senders using the same infrastructure.
Also, make sure you're checking the right IP. Your website, office network, or Domain Name System (DNS) server IP may have nothing to do with the infrastructure that sends your email.
3. Identify All Sending IPs
Your organization may use multiple sending IPs for different types of email. Build an inventory of the IPs used by each sending system, including:
- Marketing campaigns
- Transactional email
- Microsoft 365 or Google Workspace
- Simple Mail Transfer Protocol (SMTP) relays
- Dedicated sending infrastructure
- Multiple Email Service Providers (ESPs) or sending platforms
Check each sending IP separately when they handle different email streams. A clean transactional sending IP doesn't tell you whether your marketing IP has a reputation or reverse DNS issue.
How to Test an IP Against Email Blacklists: Step-by-Step Guide
Before checking an IP against email blacklists, make sure you’re testing the actual sending IP used by your mail infrastructure. Once you have the right IP, a blacklist check can show whether it appears on DNS-based blocklists (DNSBLs) or reputation lists that receiving servers may use when evaluating incoming mail.
Step 1: Identify the Sending IP
Start with the IP address associated with the email stream you're investigating. Don't assume the IP belongs to your organization because it may belong to an ESP, SMTP relay, or shared sending infrastructure.
Confirm where the IP comes from and which type of email it sends because the next steps depend on who controls the IP. If the IP belongs to an ESP or hosting provider, you may need to work with that provider to investigate or resolve a listing.
Step 2: Run a Multi-List IP Check
Use a blacklist checker that queries multiple active DNSBLs/RBLs rather than checking a single list.
A single list gives you only one data point. Different blocklists use different criteria, maintain different datasets, and have different levels of adoption among receiving systems.
A multi-list check can show whether the IP appears on:
- Major reputation blocklists
- Spam-report-based lists
- Malware or compromised-host lists
- Policy-based lists
- Regional or less widely used DNSBLs
Mailora takes this a step further by continuously monitoring sending IPs across 40+ DNSBLs and RBLs. Instead of checking each IP manually and seeing only its current status, Mailora tracks your blocklist status over time and alerts you when an IP is listed or delisted. This is particularly useful if you manage multiple sending IPs, domains, or email streams. For troubleshooting, a multi-list check gives you a broader view of the IP's current status. For ongoing protection, continuous monitoring is more useful because a one-time check cannot detect a new listing that appears afterward. Check your IP blocklist status with Mailora to see your blocklist and broader deliverability signals in one view. |
Step 3: Review Which Lists Report the IP
If the check shows a listing, don't focus only on the warning or failure status. Find out which list reported the IP and why. For each listing, record:
- The blocklist name
- Whether the listing is currently active
- The reason or category provided
- Whether the listing applies to your specific IP or a broader range
- Any remediation or removal instructions provided by the operator
Also check whether the result is current. Cached data or outdated information can make an old listing appear active, so verify important findings with the blocklist operator when possible.
Step 4: Determine Whether the Listing Matters
A listing doesn't automatically mean your email will be blocked. Blocklists differ in how widely they are used and how receiving providers apply their data.
A listing on a widely consulted reputation list may deserve more attention if the mailbox providers you're targeting rely on that list. A listing on a smaller, regional, or specialized DNSBL may have little practical effect on your recipients.
Consider:
- Major, widely consulted lists: May have a broader potential impact.
- Regional or low-impact lists: May affect only a narrower group of recipients.
- Policy or reputation lists: May point to a specific sending or infrastructure issue.
- Range-based listings: May affect a subnet or broader network rather than your individual IP.
Blocklist status is only one deliverability signal. Each receiving provider determines which lists it uses and how much weight to give them.
Step 5: Investigate the Listing Reason
If an active blocklist reports your IP, investigate the underlying cause before requesting removal. Removing the listing without addressing the cause can result in the IP being listed again. Common causes include:
- Spam or abusive sending
- Spam-trap activity
- High complaint rates
- Compromised accounts
- Open mail relays
- Malware or infected systems
- Poor list hygiene
- Sudden changes in sending volume
- Reputation problems on shared IP infrastructure
Start with the reason provided by the blocklist operator, then review your own sending activity and infrastructure for evidence that supports it.
Step 6: Check the Rest of Your Deliverability Setup
A blacklist result shouldn't be evaluated on its own because a listing is just one symptom of a broader deliverability problem, so review the rest of your sending setup before deciding what to fix. Check:
- SPF: Are all legitimate sending sources authorized?
- DKIM: Are outgoing messages being correctly signed?
- DMARC: Does SPF or DKIM align with the visible From domain?
- Reverse DNS/PTR: Does the sending IP have appropriate reverse DNS?
- SMTP configuration: Is the mail server configured correctly?
- Sender and domain reputation: Are there broader reputation issues affecting delivery?
- Inbox placement: Are messages reaching recipient inboxes or being filtered?
- Bounce and complaint rates: Are negative recipient or mailbox-provider signals increasing?
Looking at these signals together gives you more context than a blacklist result alone. An IP can be listed without that being the sole reason for poor delivery, just as a clean blacklist result doesn't guarantee good inbox placement.
If you want to see how your messages are actually performing across inbox providers, Mailora can help you test your broader email deliverability. Mailora’s free deliverability test checks inbox and spam placement and provides recommendations based on the results. This gives you additional context when a blacklist result appears alongside other delivery issues. |
How to Read an IP Blacklist Check
An IP blacklist check can return several types of results, and not every listing has the same impact on email delivery. Understanding what the results mean helps you distinguish between an active reputation issue, a low-impact listing, and a result that requires further investigation.
Result | What it means | What to do |
| Not listed | The IP was not found on the checked lists. | Continue monitoring and review other deliverability signals. |
| Listed | At least one queried blocklist has the IP. | Identify the list, reason, and potential impact. |
| Multiple listings | The IP appears on several blocklists. | Treat it as a broader reputation issue and investigate the underlying cause. |
| Range listing | A larger network or subnet is affected. | Determine whether your individual IP is specifically listed and whether the range affects your provider. |
| Listing with no clear reason | The blocklist provides limited information about the listing. | Review sending activity and consult the operator's documentation if necessary. |
| Historical or stale result | The result may not reflect the IP's current status. | Verify the status against the active blocklist before taking action. |
[Caption: Common IP blacklist check results, what they indicate, and the appropriate next step for each result.]
How to Fix a Blacklisted IP
If your IP appears on a blacklist, the next step is to determine why it was listed and whether the listing is affecting your email delivery. From there, you can investigate the cause, address any underlying sending issues, and follow the blocklist operator’s process for removal when appropriate.
Step 1: Confirm the Listing Is Active
Start by rechecking the IP address and confirming the result with the blocklist operator where possible. Third-party blacklist checkers can be useful for identifying listings, but their results may not always reflect the current status of a list.
Not every blacklist is actively maintained, and some listings may be outdated, informational, or no longer relevant to major mailbox providers. Before taking corrective action, verify:
- The exact IP address that is listed
- The name of the blocklist
- Whether the listing is currently active
- The reason or trigger provided by the blocklist
- Whether the list is still operational and relevant to your sending environment
If the listing is no longer active, you may not need to pursue delisting at all. Instead, continue monitoring your delivery performance and investigate any other signals that could explain the problem.
Step 2: Identify and Stop the Cause
If the listing is active, focus on why the IP was listed before requesting removal. Blocklists can respond to different types of behavior, so the right fix depends on the cause.
Review recent changes to your sending activity and look for anything that could have affected your IP's reputation. You may need to:
- Pause a problematic campaign or sending stream
- Investigate an unexpected increase in sending volume
- Review recent list imports, audience changes, or acquisition sources
- Check for compromised accounts, applications, or mail systems
- Look for unauthorized or unwanted traffic originating from the IP
- Review bounce, complaint, and engagement trends for unusual changes
If the issue is still active, continuing to send normally can prolong the problem. For example, if a compromised account is generating unauthorized mail, simply requesting delisting without stopping that traffic does not address the reason the IP was listed.
Step 3: Secure Your Sending Infrastructure
If your investigation points to a security or infrastructure problem, resolve it before pursuing delisting. This is especially important when the IP is being used for unauthorized sending or has been compromised.
Depending on the cause, remediation may include:
- Rotating compromised credentials
- Securing compromised mailboxes and user accounts
- Removing malware or malicious software
- Closing an open relay
- Reviewing SMTP authentication and access controls
- Restricting unauthorized applications or systems from sending mail
- Checking connected services for unauthorized sending activity
Also review who and what has permission to send through the affected infrastructure. A legitimate sending IP can develop a poor reputation when an account, application, or server is misused.
Only move to the delisting process once you've addressed the underlying issue. If the same behavior continues, the IP may be listed again after removal, making the delisting request little more than a temporary fix.
Step 4: Review Email Authentication
Once you've addressed any immediate sending or security issue, review your email authentication setup. Authentication does not automatically remove an IP from a blocklist, but incorrect or incomplete records can contribute to delivery problems and make it harder to establish a trustworthy sending identity.
Check:
- SPF: Confirm that all legitimate sending sources are authorized.
- DKIM: Verify that outgoing messages are being signed correctly and that signatures pass validation.
- DMARC: Check the policy and confirm that SPF or DKIM aligns with the visible From domain.
- Sending domains: Review the domains used by your ESPs, marketing platforms, transactional systems, and other sending services.
Pay particular attention to recent infrastructure changes. Adding a new ESP, moving to a different sending platform, or changing domains without updating authentication records can create gaps in your setup.
Step 5: Review List Quality and Sending Practices
Poor list quality can lead to hard bounces, spam complaints, and other negative signals that affect sender reputation. Review recent sending activity for:
- High or increasing hard-bounce rates
- Rising spam complaints
- Old or inactive addresses that should be suppressed
- Recent list imports or audience changes
- Purchased, scraped, or otherwise unconsented contacts
- Potential spam-trap exposure
- Sudden changes in sending volume or frequency
It can also help to compare the timing of these changes with the blacklist listing. If the IP was listed shortly after a large audience import or an unexpected increase in volume, that connection is worth investigating.
Step 6: Request Delisting From the Active Blocklist
After you've addressed the underlying problem, check the blocklist operator's documentation for its removal process. The process varies by list.
Some operators automatically remove IPs once the triggering behavior stops, while others provide a manual delisting request or require specific remediation before they will consider removal.
Before submitting a request, make sure you have:
- Resolved the issue that caused the listing
- Confirmed that unwanted or unauthorized traffic has stopped
- Followed the operator's stated delisting requirements
- Verified that the IP and listing are still active
Don't treat delisting as the fix itself. If the underlying sending or security issue remains, the IP may simply be listed again after removal.
Step 7: Monitor the IP After Delisting
Getting removed from one blocklist is not the end of the recovery process. Continue monitoring the IP and your overall deliverability after the listing is cleared.
Watch for:
- The original listing remaining cleared
- New blacklist listings appearing
- Changes in sending volume or behavior
- Increasing bounce or complaint rates
- Declining inbox placement
- Signs that sender or domain reputation is deteriorating again
If the IP is repeatedly listed, avoid repeatedly submitting delisting requests without investigating further. Recurring listings can indicate an unresolved issue with your infrastructure, list quality, sending practices, or security controls.
The objective is not simply to get off a blacklist. It's to identify and resolve the conditions that caused the listing so the IP can maintain a healthier sending reputation over time.
How to Prevent Future IP Blacklist Listings
Preventing future blacklist listings means maintaining the factors that influence sender reputation and catching problems early. Use the following practices to keep your sending infrastructure, authentication, list quality, and reputation in check.
What to do | Why it matters | What to check |
| Maintain clean mailing lists | Poor-quality lists can increase bounces, complaints, and spam-trap exposure. | Remove hard bounces and suppress inactive or unwanted recipients appropriately. |
| Monitor bounce and complaint rates | Sudden increases can indicate deteriorating lists or sending quality. | Track trends and investigate unusual spikes promptly. |
| Authenticate your sending domains | Proper authentication helps mailbox providers verify legitimate senders. | Maintain valid SPF, DKIM, and DMARC records. |
| Keep SPF within the 10-DNS-lookup limit | Exceeding the limit can cause an SPF PermError and undermine authentication. | Review include, a, mx, ptr, exists, and redirect mechanisms. |
| Maintain DKIM and DMARC alignment | Misalignment can affect authentication and DMARC evaluation. | Ensure SPF or DKIM aligns with the visible From domain where required. |
| Secure mailboxes and SMTP credentials | Compromised accounts can generate unauthorized traffic and damage IP reputation. | Review credentials, mailbox access, SMTP authentication, and unusual sending activity. |
| Configure reverse DNS correctly | Appropriate PTR and SMTP configuration supports a consistent sending identity. | Confirm the IP has valid reverse DNS and that the mail server configuration is appropriate. |
| Avoid sudden sending spikes | Unexplained volume changes can affect sender reputation, especially on newer or shared infrastructure. | Monitor volume and investigate unexpected increases before they become sustained. |
| Monitor shared-IP reputation | Other senders using the same IP can affect its reputation. | Check whether your provider uses shared infrastructure and monitor the IP's reputation. |
| Monitor active blocklists continuously | A one-time check can miss new listings that appear later. | Monitor relevant DNSBLs/RBLs and investigate new listings promptly. |
[Caption: Key practices for reducing the risk of future IP blacklist listings.]
Why a Clean IP Doesn’t Guarantee Inbox Placement
A clean IP blacklist check is a positive signal, but it does not guarantee that your emails will reach the inbox. Mailbox providers evaluate multiple signals when deciding whether to accept, filter, or place a message in spam. For example, delivery can still be affected by:
- Email authentication: SPF, DKIM, and DMARC failures or alignment issues can reduce trust.
- Sender reputation: Providers consider the broader reputation of your IP, domain, and sending history.
- Engagement: Low engagement, frequent deletions, or recipients ignoring your messages can influence filtering decisions.
- Content and links: Certain content patterns, domains, or URLs can trigger additional filtering.
- List quality: High bounce or complaint rates can indicate poor-quality or unwanted sending.
- Sending behavior: Sudden volume increases or unusual sending patterns can affect how providers view your traffic.
For example, Google recommends that senders maintain proper SPF, DKIM, and DMARC authentication, use valid forward and reverse DNS, and maintain low spam rates. Gmail also considers recipient feedback and sender reputation when filtering messages.
It means an IP can pass a blacklist check and still experience poor inbox placement. If the sending domain has a weak reputation, authentication is misconfigured, recipients frequently mark messages as spam, or sending behavior changes sharply, mailbox providers may still filter the mail.
The same principle applies beyond Google. Blacklist status is one reputation signal, not a complete measure of inbox placement. To understand why messages are being filtered, you need to look at the broader deliverability picture.
IP Blacklist Check vs. Continuous Blocklist Monitoring
A one-time IP blacklist check tells you whether your IP appears on the lists checked at that moment. Continuous blocklist monitoring goes further by watching for new or recurring listings over time, so you can identify reputation issues sooner and investigate them before they become persistent deliverability problems.
One-Time IP Check | Continuous Blocklist Monitoring |
| Checks status when you run it | Tracks status continuously |
| Can miss new listings between checks | Detects changes as they occur |
| Usually requires manual investigation | Provides automated alerts |
| Shows current status | Shows status and history |
| Useful for troubleshooting | Useful for ongoing reputation management |
[Caption: Difference between one-time check and continuous monitoring]
A one-time blacklist check tells you where your IP stands when you run it, but listings can change between checks, which makes continuous monitoring more useful for teams managing ongoing email programs.
Mailora monitors IPs and domains across 40+ DNSBLs and RBLs, including Spamhaus, Barracuda, URIBL, and CBL. It alerts you when a new listing is detected and keeps a history of listed and delisted events, so you can identify recurring reputation issues instead of relying on manual checks. Mailora also brings blacklist status together with SPF, DKIM, and inbox placement data, giving you a broader view of the signals affecting email deliverability. |
FAQs
What is an IP blacklist, and how does it work?
An IP blacklist (or blocklist) is a published database of IP addresses flagged for spam, malware, or other abuse. Operators build these lists from signals like spam-trap hits, complaint reports, and security systems, then publish them over DNS. Receiving mail servers and security systems query these lists in real time over DNS before accepting a connection, and a listed IP is often rejected or sent to spam.
What's the difference between an IP blacklist and a domain blacklist?
An IP blacklist flags the sending IP address, while a domain blacklist flags a domain name. Some lists cover IPs while lists like the Spamhaus DBL and Uniform Resource Identifier (URI) blocklists cover domains appearing in message bodies. A domain listing can come from a link you included rather than your sending infrastructure.
What are the major email blacklists worth checking against?
The most widely consulted blacklists are Spamhaus, Barracuda, SpamCop, and UCEProtect, and Spamhaus is the most influential in email deliverability, affecting delivery to a wide range of mailbox providers and corporate mail servers.
How long does it take to get removed from a blacklist?
It varies by list, and the clock only starts once you've fixed the underlying cause. SpamCop auto-delists in 24–48 hours without new reports, Spamhaus typically processes manual requests in 24–48 hours, Barracuda usually responds within 12–24 hours, and UCEProtect has a standard 7-day period with a paid express option. After removal, changes can take up to 24 hours to propagate, and some mail servers cache the old listing, so verify before assuming it's cleared.
Will changing my IP address remove a blacklisting?
Not reliably, and it's rarely the right fix. Moving to a new IP abandons the listing along with whatever reputation the old IP carried, and re-listing can happen within hours if the underlying problem recurs, so the fresh IP gets listed too. A new IP also starts with no sending history, which mailbox providers treat cautiously until it's warmed up. Fix the cause first because delisting the existing IP is usually faster than rebuilding trust from zero.
Is it free to get delisted from a blacklist?
For most major lists, yes. Spamhaus doesn't accept payment for removal, you resolve the cause and request delisting at no charge. A few lists differ: UCEProtect, for instance, offers a paid express option alongside its free standard timeline.
Stay in the loop
Deliverability insights, product updates, and early access to new features. No spam, unsubscribe anytime.
By subscribing, you agree to our Privacy Policy. Unsubscribe anytime.